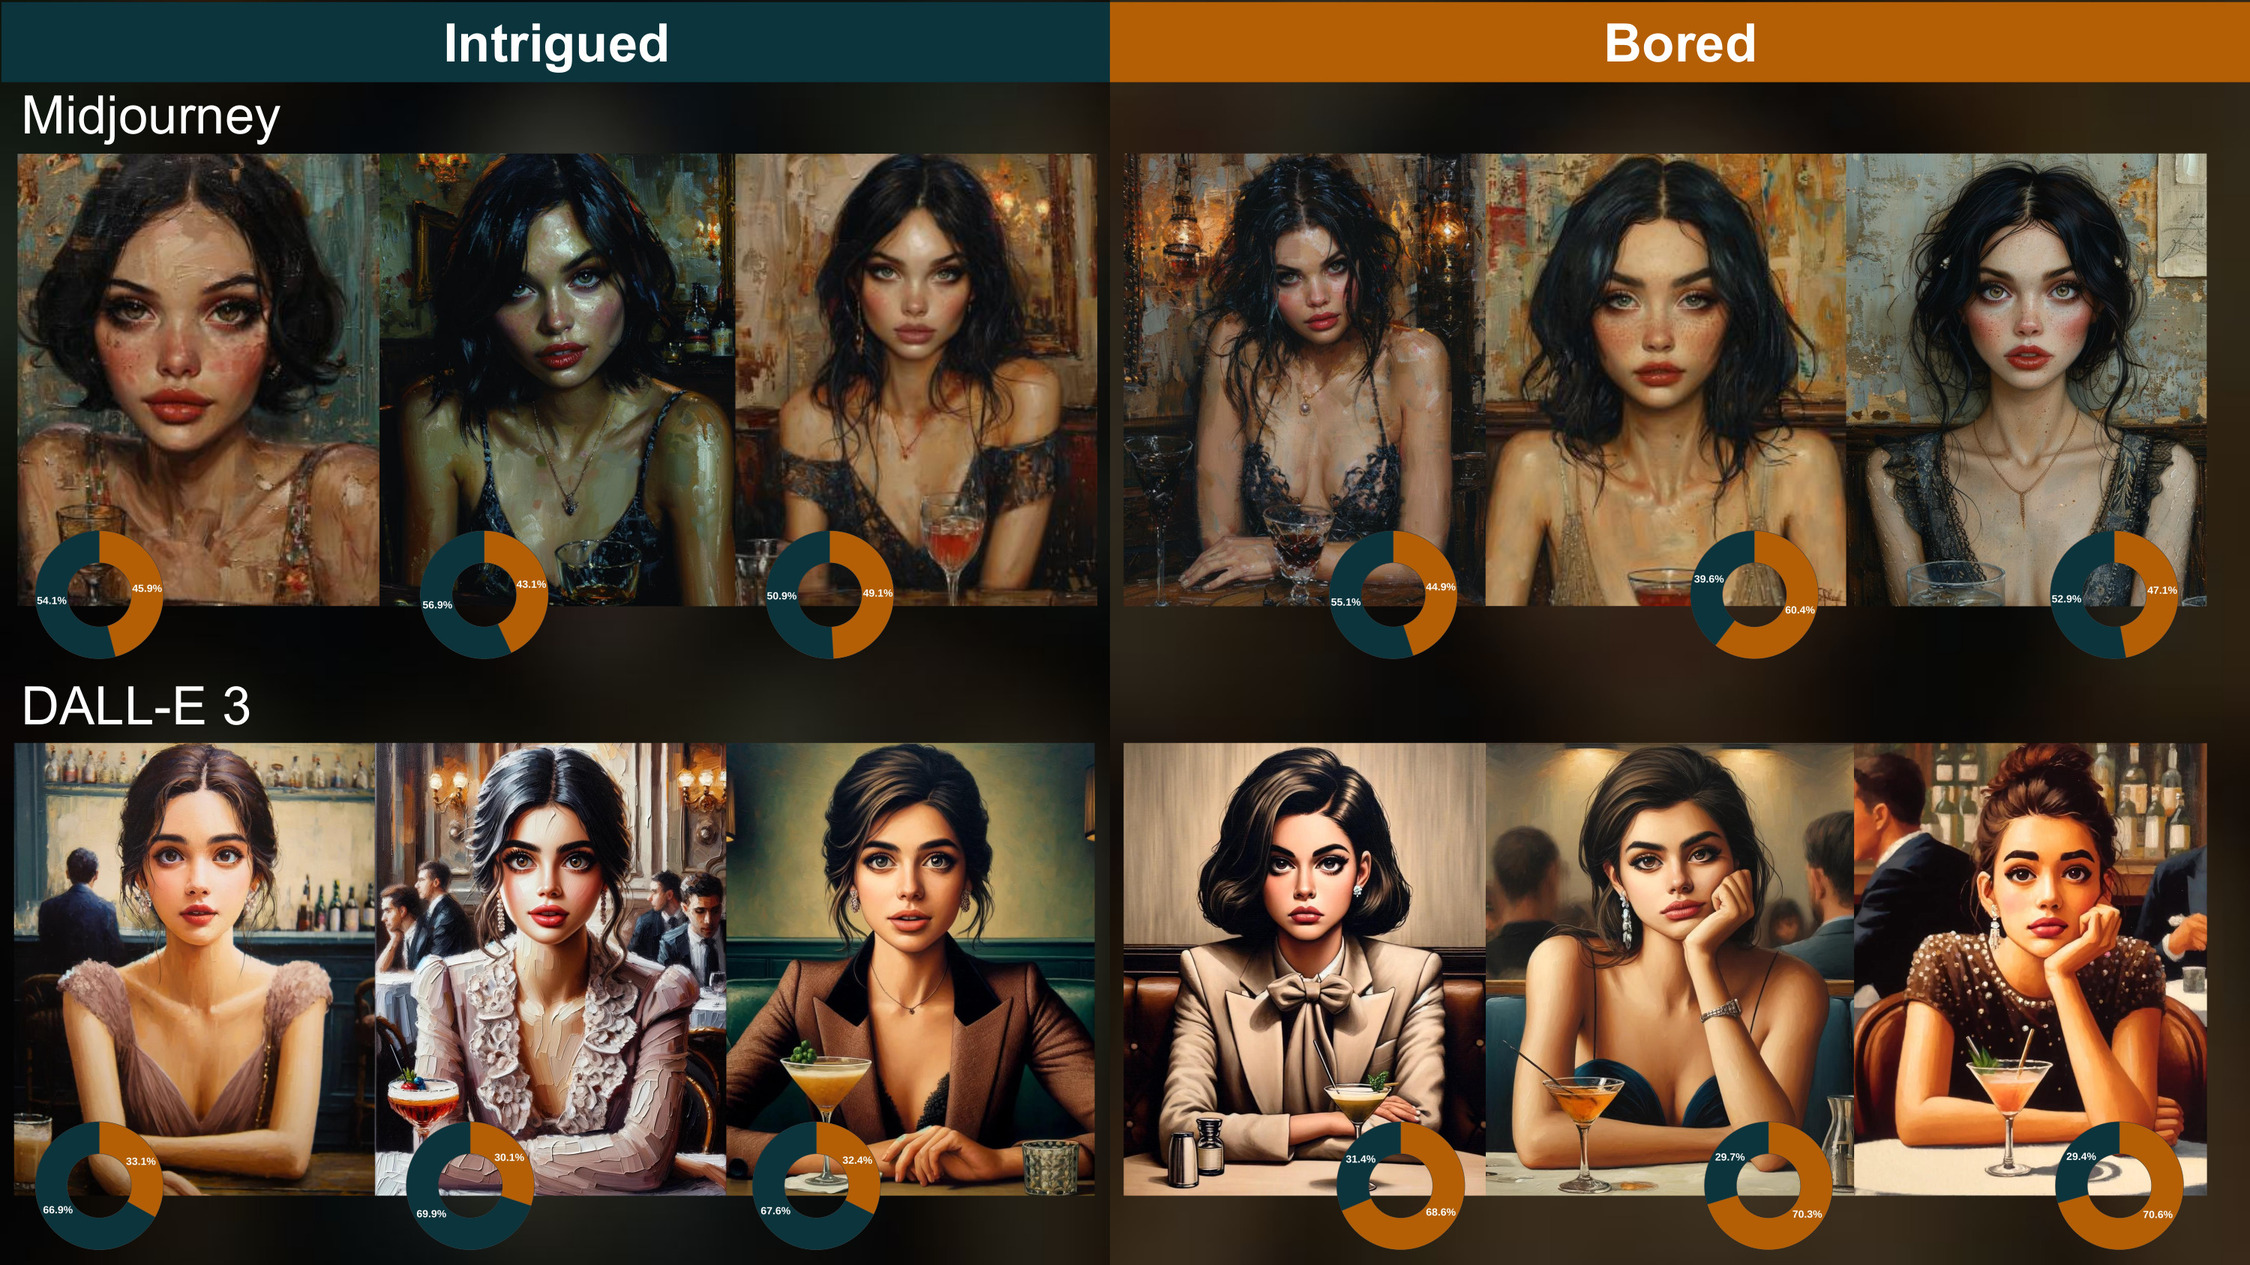
As detailed in our LinkedIn post, we collected more than 6000 votes from people around the world finding that DALL-E 3 better portrays the explicit sentiment and emotion in this experiment. Below we go through the steps we took to set up and run the experiment, allowing you to replicate ours or configure your own.
Step 1: Generate (or download) the images
We generated images using DALL-E 3 (through ChatGPT) and Midjourney. You can download our images, or if you prefer to generate your own, use variations of the following prompt, selecting between bored or intrigued:
/imagine artwork featuring a young woman at a bar. dark hair, large eyes, full lips, wears an elegant dress. first date,
she is sitting at a small table looking <bored/intrigued>. She is pictured front-facing, medium close-up. classy cocktail
on table. Oil painting style, larger brush strokes in the background. detail on the woman, intricate details and textures
around the eyes and lips. warm but slightly muted colors --stylize 421 --ar 4:5
Step 2: Configure with Rapidata
All you need to do to start the experiment is to install the Rapidata package and run the code below. For more detailed information, checkout out our documentation.
pip install rapidata- We can now set up the file paths and create the order:
import os
base_path = "path/to/folder/intrigued_bored_images" # make sure it's unzipped
files = os.listdir(base_path)
file_paths = [os.path.join(base_path, f) for f in files]- We can now create the order and see what people think:
from rapidata import RapidataClient

client = RapidataClient()

order = client.order.create_classification_order(
    name="Bored or Intrigued",
    instruction="First date, is she bored or intrigued?",
    answer_options=["She is intrigued", "She is bored"],
    datapoints=file_paths,
    responses_per_datapoint=50
)

order.run() # this will start the annotation process and print a link to see the progress- Get the results json file:
results = order.get_results()